Player Test ID
Mega888 Apk Original Android dan IOS Muat Turun Slot Dalam Talian Terbaru 2024
Dalam era digital ini, perjudian dalam talian semakin menjadi pilihan utama para penjudi di Malaysia, dan di tengah pesatnya persaingan, Mega888 muncul sebagai pemimpin dalam industri ini. Dengan pelbagai permainan yang menghiburkan dan pelbagai kemudahan, Mega888 telah mencipta gelombang di kalangan pemain di seluruh negara. Artikel ini akan membongkar keunikan Mega888, proses muat turun aplikasinya, dan mengapa ia terus menjadi pilihan utama dalam dunia perjudian dalam talian Malaysia.
Mega888: Pembukaan kepada Dunia Perjudian yang Mempesonakan:
Mega888 bukan sekadar platform perjudian dalam talian; ia adalah pintu masuk kepada dunia hiburan yang menarik, dihiasi dengan permainan mengasyikkan dan pilihan yang tak terhitung. Pemain di Malaysia telah merasai getaran keunikan yang ditawarkan oleh Mega888, menjadikannya destinasi perjudian utama mereka.
Mega888 APK: Cara Mudah Memulakan Pengembaraan Perjudian Anda:
Mega888 menyediakan akses mudah melalui Mega888 APK, membolehkan pengguna untuk memulakan perjalanan perjudian mereka dengan cepat dan mudah. APK ini membuka pintu kepada pelbagai permainan slot, permainan meja, dan peluang menang besar, menjadikan Mega888 APK pilihan yang mudah diakses untuk semua pengguna peranti Android.
Proses Mega888 Download: Memasang Aplikasi dengan Mudah:
Proses muat turun Mega888 adalah langkah awal untuk menyertai komuniti perjudian dalam talian yang menarik. Pengguna Android boleh Mendapat Apk Mega888 Download dari laman web rasmi, sementara pengguna iOS boleh mendapatkannya dari App Store. Proses pemasangan yang pantas dan mudah memastikan pemain dapat segera merasai keseronokan perjudian dalam talian.
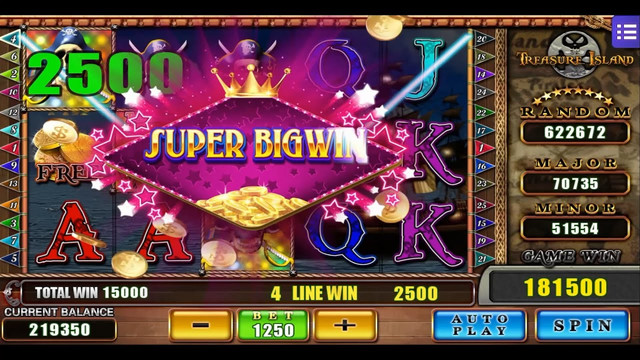
Mega888 Slot: Pencapaian Puncak Hiburan Perjudian:
Mega888 menyajikan pengalaman slot yang tidak dapat dipadankan. Dengan pelbagai slot yang menggembirakan dan menarik, pemain dapat menjelajah pelbagai tema, dari yang klasik hingga yang inovatif. Slot dalam Mega888 bukan sahaja menghiburkan, tetapi juga menjanjikan ganjaran yang besar kepada para pemain yang bertuah.
Mega888 Original: Keaslian dalam Setiap Permainan:
Keaslian adalah asas kejayaan Mega888. Setiap permainan dalam platform ini adalah ciptaan asli, dirancang dengan penuh kreativiti untuk memberikan pengalaman yang tidak dapat ditemui di mana-mana tempat lain. Keaslian ini tidak hanya menyokong reputasi Mega888 tetapi juga memberikan kepuasan yang unik kepada para pemainnya.
Mega888 Malaysia: Mencerminkan Kecantikan dan Budaya Tempatan:
Mega888 tidak hanya sekadar sebuah platform perjudian; ia juga mencerminkan keunikan budaya Malaysia. Dengan tema-tema yang menggambarkan kecantikan dan warisan tempatan, Mega888 memberikan sentuhan personal yang membuat pemain merasa seperti di rumah, mencipta ikatan emosional yang berkekalan.

Aplikasi Mudah Alih:
Kebolehgunaan adalah kunci, dan Mega888 telah melangkah lebih jauh dengan menyediakan aplikasi mudah alih yang memudahkan akses kepada permainan di mana-mana sahaja. Pengguna boleh menikmati permainan kegemaran mereka melalui telefon pintar atau tablet, menambahkan elemen keselesaan dan mobiliti kepada pengalaman berjudi mereka.
Mega888 iPhone: Pengalaman Perjudian yang Mulus di Dunia Apple:
Pengguna iPhone tidak terkecuali dari pesona Mega888. Dengan mendapatkannya dari App Store, pengguna iOS dapat menikmati serentak permainan berkualiti tinggi dan grafik yang memukau. Pengalaman perjudian Mega888 di iPhone memastikan kelancaran dan kepuasan tanpa kompromi.
Mega888 Android: Keserasian dan Ketersediaan yang Luas:
Ketika berbicara tentang keserasian, Mega888 memberikan keutamaan kepada pengguna Android dengan menyediakan Mega888 APK yang dapat dimuat turun dan dipasang dengan mudah. Ini memastikan bahawa pelbagai peranti Android dapat menikmati perjudian yang seru dengan Mega888.
Permainan yang Mengasyikkan:
Salah satu faktor utama yang membuat Mega888 begitu disukai adalah koleksi permainan yang menyeronokkan dan bervariasi. Dari slot yang berwarna-warni hingga permainan meja yang mencabar, setiap pemain dapat menemui sesuatu yang sesuai dengan selera mereka. Tema-tema yang kreatif dan animasi yang menarik membuat pengalaman perjudian menjadi lebih hidup dan mengasyikkan.
Kelebihan Komuniti Mega888: Interaksi dan Semangat Bersama:
Mega888 bukan sekadar tempat berjudi; ia adalah komuniti yang hidup. Dengan kemudahan sembang dalam permainan, pemain dapat berinteraksi satu sama lain, berkongsi strategi, dan merayakan kemenangan bersama. Komuniti Mega888 memberikan elemen sosial yang seru kepada pengalaman perjudian dalam talian.
Keseluruhan Pengalaman Mega888: Gabungan Keseronokan dan Keuntungan:
Keseluruhan pengalaman perjudian dengan Mega888 adalah kombinasi antara keseronokan dan potensi keuntungan. Dengan permainan berkualiti tinggi, grafik menarik, dan pelbagai kemudahan, Mega888 tidak hanya menawarkan hiburan yang tak terlupakan tetapi juga peluang untuk memenangi ganjaran besar.
Kemudahan Penarikan yang Efisien:
Memenangi wang adalah satu kejayaan, dan Mega888 memastikan pemain dapat menikmati hasil kemenangan mereka dengan mudah. Proses penarikan yang pantas dan efisien adalah ciri penting yang meningkatkan reputasi positif Mega888 di kalangan pemain.
Penawaran Bonus dan Promosi:
Ketika bersaing dengan platform lain, Mega888 tidak berkekurangan dalam menawarkan bonus dan promosi yang menggiurkan. Pendaftaran baru sering disertai dengan bonus selamat datang, manakala promosi bulanan menyajikan peluang tambahan untuk menang besar. Ini bukan sahaja meningkatkan daya tarik, tetapi juga memberi nilai tambah kepada pemain setia.
Pilihan Bahasa dan Sokongan Pelanggan:
Mega888 tidak hanya memahami kepelbagaian pengguna, tetapi juga mementingkan komunikasi yang efisien. Dengan menyediakan pelbagai pilihan bahasa, termasuk Bahasa Malaysia, Mega888 memastikan semua pemain dapat memahami dan menikmati pengalaman mereka. Selain itu, sokongan pelanggan yang responsif membantu pemain menyelesaikan sebarang masalah dengan mudah.
Apa cara untuk memenangi Jackpot dalam Mega888?
Apa cara untuk memenangi Jackpot dalam Mega888? Ini adalah persoalan yang sering ditanya oleh pemain yang ingin mencapai kejayaan besar dalam permainan kasino dalam talian. Walaupun tiada strategi pasti untuk memenangi Jackpot, terdapat beberapa tips dan panduan yang boleh membantu meningkatkan peluang anda:
Pilih Permainan Jackpot yang Sesuai:
Pertama sekali, pastikan untuk memilih permainan Jackpot yang sesuai dengan kebolehan dan minat anda. Setiap permainan Jackpot mungkin mempunyai mekanisme dan ciri-ciri yang berbeza, jadi carilah yang sesuai dengan gaya permainan anda.
Bermain dengan Pelan dan Sabar:
Bermain dengan pelan dan sabar adalah kunci untuk meningkatkan peluang memenangi Jackpot. Jangan tergesa-gesa atau terlalu teruja untuk bertaruh dalam jumlah besar. Sebaliknya, pertimbangkan setiap langkah anda dengan teliti dan bermain dengan bijak.
Menguruskan Bajet dengan Baik:
Penting untuk menguruskan bajet anda dengan bijak apabila bermain dalam permainan Jackpot. Tetapkan had kerugian yang munasabah dan berhenti bermain apabila had tersebut dicapai. Jangan terlalu terpedaya untuk terus bertaruh dalam usaha untuk mengejar kerugian.
Mengamalkan Kesabaran dan Konsistensi:
Jackpot mungkin tidak akan dimenangi dengan cepat atau mudah. Oleh itu, penting untuk mengamalkan kesabaran dan konsistensi dalam permainan anda. Teruskan bermain dengan tekun dan yakin bahawa kejayaan akan datang jika anda berusaha dengan gigih.
Mengikuti Strategi yang Terbukti:
Terdapat pelbagai strategi dan tip yang boleh membantu meningkatkan peluang anda untuk memenangi Jackpot. Ambil masa untuk mempelajari strategi yang terbukti dan terapkan mereka dalam permainan anda dengan bijak.
Bagaimanakah proses menambah dana dan cuci dana di Mega888?
Menambah Dana:
- Log Masuk ke Akaun: Langkah pertama adalah log masuk ke akaun Mega888 anda menggunakan butiran log masuk yang telah anda daftarkan semasa pendaftaran.
- Pilih Menu Deposit: Setelah log masuk, cari dan pilih menu deposit yang terdapat di laman web atau aplikasi Mega888.
- Pilih Metode Pembayaran: Pilih metode pembayaran yang anda ingin gunakan untuk menambah dana ke akaun anda.
- Isi Butiran Pembayaran: Masukkan maklumat pembayaran yang diperlukan seperti jumlah yang ingin anda depositkan dan maklumat akaun anda.
- Konfirmasi dan Sahkan: Sekali lagi, pastikan untuk memeriksa semula maklumat yang dimasukkan sebelum mengesahkan transaksi deposit.
Membuat Pengeluaran Dana:
- Log Masuk ke Akaun: Seperti sebelumnya, log masuk ke akaun Mega888 anda menggunakan butiran log masuk yang tepat.
- Pilih Menu Pengeluaran: Carilah dan pilih menu pengeluaran (cuci dana) yang terdapat di laman web atau aplikasi Mega888.
- Isi Butiran Pengeluaran: Masukkan maklumat pengeluaran yang diperlukan seperti jumlah yang ingin anda keluarkan dan butiran akaun penerima.
- Lengkapkan Proses Pengeluaran: Setelah maklumat dimasukkan, hantar permintaan pengeluaran anda. Pengeluaran biasanya akan diproses oleh pihak Mega888 dalam tempoh yang ditetapkan.
- Pantau Status Pengeluaran: Pantau status pengeluaran anda melalui akaun anda untuk memastikan bahawa dana telah dipindahkan dengan berjaya ke akaun penerima.
Cara Daftar Akaun dan Masuk ke Dalam Gem Mega888
You boleh chat Whatsapp amoi untuk membuat akun yang berupa nombor. Tentukan Password Sendiri dan pilih lalui minta admin guna membuat password yang di inginkan. Tetapi, ingat untuk x berkongsi kata laluan dengan kawan - kawan anda siapa pun, guna keselamatan daripada penjenayah.
Sulit ke untuk Menarik wang keluar ke akaun bank?
Wang di Akaun anda akan di tarik, dan akan di hantar ke dalam akaun bank anda dalam sekejap. Penarikan wang biasanya tidak mengambil masa melebihi 5 minit.
Senang Main, Senang Cuci Hanya di Mega888
You tidak Perlu takut akan kemenangan di Mega888.Anda hanya harus fokus bermain dan mengumpulkan saldo sebanyaknya. Guna untuk enjoy gem tanpa tekanan dan senang cuci. Di Mega888 APK, anda harus boleh memenangi banyak wang daripada mega jackpot dan angpao dalam gem Mega888.
Ada Banyak Bonus Muat Turun Apk, dan Free Bonus Percuma di Mega888.
Lebih dari itu, Mega888 menawarkan pelbagai Bonus percuma ahli baru dan promosion yang boleh anda rasakan dari pautan kami.
Penutup:
Mega888 tidak sekadar menjadi platform perjudian dalam talian di Malaysia; ia adalah pengalaman yang menjadikan setiap sesi perjudian berharga dan mengasyikkan. Dengan kemudahan muat turun Mega888, pelbagai permainan menarik, dan keunikan dalam setiap slot, Mega888 terus mengukuhkan kedudukannya sebagai destinasi utama perjudian dalam talian di Malaysia. Bagi mereka yang mencari kombinasi antara hiburan dan peluang keuntungan, Mega888 adalah jawapan yang tidak dapat diabaikan.
Mega888 APK ANDROID IOS 2024 Download *Terkini*
By Syarikat Rasmi mega888 Di Malaysia 100%
MEGA888 APK Muat Turun Kasino Terbaru 2024. Mega888 Register login ID & bonus ahli baru! Daftar akaun Baru Sekarang!Requires : ANDROID, IOS,WINDOWS
Review: 3119738views